Sunday, August 31, 2008

23, It starts to come together.

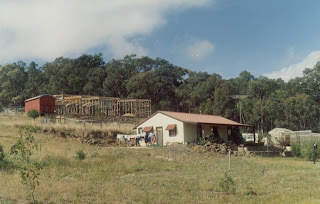
The time had come to start putting things together. I dug 2 big holes in which to pour concrete footings to bear the weight of the machine. Being winter, the rain became a bit of a problem causing the recycled concrete surface to start disappearing below the mud. I used templates, supplied by the manufacturer of the supports, to position 25mm anchor bolts in the pads.
With the concrete cured, the supports were loosely bolted into position, ready to take the main frame.
We contracted the services of “Knight Crane Trucks”, from Geelong to transport the main frame the 90km from Brooklyn to home. In late June 2002 it arrived and the $500.00 charged proved to be money well spent, with outstanding service being provided by the operator who was able to lift the 4.5tonnes perfectly into position with no fuss whatsoever. This task would have next to impossible using the front end loader, with pneumatic tyres, lifting its maximum weight on the muddy ground.

With the frame in place, it seemed pretty obvious that it needed a lid to keep the rain off, so the hayshed was reincarnated. I erected 2 rows of treated pine poles about 5.4m apart onto which I fixed 300 x 50mm pine beams, wedge shaped fillets were fitted on top of these to support the battens and give the roof some fall.
Once the frame was erected it became apparent that the work area was still very exposed, this being due to the height the walls had to be to allow clearance for the machine. I then decided to enclose the south wall to keep the worst of the weather out. After completing this, I couldn’t help myself and continued around the other sides. On the north side I angled the cladding across to the retaining wall to gain some extra space and avoid having an unusable strip down the side.

A recirculating system was needed to be installed for the water. For this I dug a hole in the floor and formed a concrete settling tank, roughly about 2m long by 1.2m wide and 1m deep, to allow the sediment to sink to the bottom. A central baffle created 2 separate tanks with the outflow pouring into a separate storage. This third tank consists of a 1m diameter concrete pipe, about 1.5m long, upended and concreted into position below the floor level.

Some old tram rails we happened to have lying around came in very handy. I set them up 1200mm apart and as true and straight as possible with the top surface at floor level. To these I would be able to the weld adjustable brackets to take the trolley rails. I carried them out the rear of the shed to enable me to load and unload stone outside, this later proved to be unnecessary.

Friday, August 29, 2008

22, Accumulating more bits.

The first hurdle to be crossed was what I would use to spin the blade. As 3 phase power was out of the equation, an alternative had to be found. Stumbling blindly along without doing too much research, I followed up with someone's suggestion of a hydraulic system.

Scouring the local junk yards around Geelong, I happened across this piece of machinery at a tractor wrecker in Breakwater. It was an experimental contraption designed and built on the Mornington peninsula to form planting mounds, it was a failure. The good news was that its operating system was hydraulic, consisting of a 200 litre tank, a high volume pump, motor, heat exchanger, return manifold with filter and various lengths of hose and fittings. Great, I thought, my complete drive system and all for only $750.00, ....wrong, ...again!.
The motor was found to be far too slow, and, as more homework was done the list of more hydraulic parts required for the proper and safe operation of the saw continued to escalate.

The next thing from my shopping list to be located was a 250:1 reduction drive, procured from the same supplier as the main frame and thrown into the deal. This was to be used to transfer power from a variable speed electric motor to an endless cable. The cable was to be set in the floor to propel a trolley that would carry the stone.

The second most expensive component was to be the diamond blade. I splurged out the amount of $1800.00 and purchased a 1200mm, (4 ft), blade from "Australian Diamond Tools, in Heidelberg West, Melbourne, (highly recommended). This size would give me a maximum cutting depth of 460mm, I figured that anything smaller would be a waste considering the size of the machine. With this in my possession I was then able to match the rest of the bits to it.

The next major hurdle to be overcome was a power source. Given the size of the blade I had bought, I calculated that I would need about 40hp to run it effectively. A diesel motor seemed to be the logical answer, however, the asking price for an engine of this size was in the vicinity of $3,000 to $5,000. Time to think laterally again!. The solution, this time came in the form of a Nissan "Vanette".
After a bit of browsing in the "Melbourne Trading Post", I headed out to Epping after work one night and, after handing over $700.00, drove this little beast, part of the "Australia Post" fleet in a previous life, the 130 odd kilometres home. The 4 cylinder diesel purred along beautifully and I managed to get a bit of mileage out of the 3 months of registration left on it.

21, Where am I going to stick it?

My next problem was finding a flat spot to put the saw on, a bit of a problem with our block. I opted to hide it behind my existing workshop, which meant flattening our hay shed as well as the ground.
I constructed a new retaining wall using pine posts and sleepers which I had previously milled and had treated. We then spread a load of recycled concrete gravel around to give me a stable surface to work on.
The rocks were pushed aside from a previous retaining wall that ran alongside the hayshed. Once again the trusty old front end loader earned its keep, digging out the excavation and carting the earth to a heap, out of the way in the paddock behind.

Thursday, August 28, 2008

20, I'm off, sideways.

The time came for me to think sideways, I figured that a machine capable of simply spinning an adjustable blade could be built for far less than that which I had been quoted. One recommendation later and there I was, at the start of May 2002, speaking to the owner of an engineering firm in based in North Shore, (Geelong). A simple phone call from this chap had me on the way to Brooklyn, in Melbourne, to inspect an adjustable head onto which I may be able to mount an arbour.
What was needed was a simple mechanism with "x" and "y" travel, (horizontal and vertical).

What I was shown, buried behind a large pile of machinery, was a 4.5 tonne lump of cast iron, in the form of a gearbox fitted to a 4 metre horizontal slide, onto which was mounted 2 adjustable heads. At first I was gob smacked, but as I climbed around it, contemplating the logistics involved and the $1,500.00 price tag, I figured that maybe bigger is better and the deal was struck.
I now had the main frame for my own saw, around which, everything else could be designed and assembled, even though it was about 5 times the size that I had envisaged!.
That was the hard bit out of the way, or so I thought!!!
The services of the engineering firm were then engaged to construct 2 stands onto which I would be able to mount the machine. Each of these were to consist of 2 vertical uprights, 1550mm long, of 450mm x 190mm H section steel beams, which I had scrounged from scrap, along with a base and top bracket manufactured from surplus 25mm plate. The bill for the production of the stands came to a total of about $2000.00, this made these the most expensive single item(s) of the entire saw project.
From this point on, with the exception of the machining of an arbour and a small amount of specialist welding, the machine was entirely of my own design and manufacture, with a bit of specialist advice gleaned along the way.
Design is probably the wrong word as the entire saw actually evolved around the mainly scavenged components.

19, An easier way to do it?

By this stage of the construction, the sawing of the stone was starting to take it’s toll on me, using a 9” (225mm) dry diamond blade fitted to an angle grinder is an incredibly dirty and dusty job. Each time I was to do some cutting I needed to don protective coveralls, a respirator, ear muffs and safety glasses, very time consuming and uncomfortable. The work was very laborous as the the blade only allowed me to cut a maximum of about 3” deep for the initial cut, this meant that I had to either do an extra cut from the back, or for thicker blocks, the waste had to be chiselled away to allow for each subsequent cut. These cuts could then only be cut angled, to a maximum of about 2 to 2 ½” depth, which resulted in the surface being rather corrugated.

The surfaces in this state were excellent for bonding, but, too often for my own sanity, I always tended to be left with high spots. Murphy's law always dictated that a high spot on a bed would always correspond with another on the head of the stone below, requiring removal of the block and extra chiselling needing to be done. This tended to be frustrating and time wasting on the days that I would dedicate to laying.
While reading the book “Building with stone” by Peter Kincaid, I was inspired by his use of a hired “wet” saw to shape his blocks. This had led me, early in the year, to begin searching for a saw suitable for my own purpose. I perused all the “used machinery” catalogues I could get my hands on and scoured all the available media classified advertising for quite some time, but to no avail. I placed “wanted to buy” ads in various publications, but also came up dry. The only machinery that appeared to be available were basically oversized “brick saws”. These machines are only designed for the re-cutting of already dimensioned stone, they were not suitable at all for doing parallel cuts on rough blocks.
My search then took me to suppliers of new equipment. Ultimately the most modestly priced machine available, that was capable of meeting my needs, was going to set me back about $35,000.00!. This was a 3 phase machine with a blade size of about 600mm.
With the costs of bringing 3 phase power about 5km to reach my front gate and then a further 200m onto the property, along with the shipping charges and import duties etc. the price was going to be, at least, double that. This was out of the question.

18, A start is made on the East wall.

April, 2002 saw me commence work on the East wall, projecting south from the existing cottage.
Behind this first course I used common concrete bricks to ensure a solid, flat surface was available for the fixing of the internal framework. I was doing the same at heights of 1200mm, 2400mm and 3600mm for the intermediate fixings and the top plate. The rubble that I was using to fill the backs of the walls was too irregular to guarantee suitable anchor points.
An example of a bond stone with the head chiselled true to maintain neat jointing.

By mid May 2002, I had the window cills in place. At the end of the month, with the wall about 25% complete my attention was temporarily (or so I thought at the time!)refocussed. The laying was to cease for about the next 4 years, another related project was about to consume my life!.

17, Keystones.


By the 1st of February 2002 we had finally purchased our first digital camera (no more scanned pics!), and I had the keystones ready to put into position. They are to sit over the Limestone lintels on the West wall.

These Keystones help to support the wall loads over the window and door openings. As no steel lintels are used I wanted to make sure that the structure is solid.
Behind the lintels I poured reinforced concrete beams These, I hope, will prevent the limestone from cracking should any movement occur. Above these and behind the Keystones I formed rough brick arches to ensure the load is spread to the sides. It all sounds like an overkill, but you tend to be more pedantic with your own house.
The ground floor west wall finally completed on the 19th of March 2002 with the string course in place.

Wednesday, August 27, 2008

16, The laying resumes.

February 2001, and I was back into the stone laying, by this stage I was very seriously regretting having used the Beeac church stone for the base walls. My skills with the chisels and angle grinder had vastly improved and I was much happier with the quality of the stonework that I was producing. I don't mind so much the poorer work that I had done on the back walls but have been considering re-doing the front section.
I covered the framed rear section with temporary roofing and clad the sides with used weatherboards to protect the pine, this also allowed us some extra sheltered areas.
By mid March I was up to the halfway mark with the southern end of the west wall. The concrete slab for the front verandah, which will sit on the red bricks on the right will be done at a later date.

Tuesday, August 26, 2008

15, Splitting, big time.


With a large stockpile of rocks to work with I needed to rethink my method of splitting the stone. Up to this point I had been enjoying the old manual method of using plugs and feathers in drilled holes, needless to say, this is very time consuming. In early June we bit the bullet and contracted in some outside help for a few days, we needed some heavy artillery. This came in the form of the massive home made splitter seen in the above pictures. The proud owners of this machine are a family business, based in Anglesea who operate quarries in Aireys Inlet, for sandstone and in Harcourt, for Granite. The splitter was operated hydraulically, a three phase generator on the truck powered an electric motor coupled to the hydraulic pump. Wheels are attached and the machine is lowered to the horizontal position for transportation.
Over the three days we split down about half of the rocks. We produced a nice pile of blocks suitably sized for final dressing and shaping, with an average thickness of about 150 to 250mm.

14, A good supply of stone.


May of 2000 and my search for a supply of good stone had taken me to Warrion, a small town nestled on the eastern slopes of Warrion hill. This cone is situated at the northern end of the Red Rock volcanic complex on the east shore of lake Corangamite and to the north of Colac. It was from this same lava flow that the basalt had been sourced for use on the church in Beeac. I had been looking in an ever increasing arc including the Winchelsea, Wingeel, Little River and Stonehaven areas with no success.
I was fortunate as I found a farmer who had recently had large areas cleared of stone for cropping, the rock had been gathered into large piles, this enabled my father and I to select the better ones for my purpose. Our truck, pictured above carries about 11 tonnes, with it we carried about 6 loads the 90 or so kilometres back to my place with an extra trip back to pick up the front end loader.
This stone was much superior to that which I had previously tried to work, it split cleanly in straight lines, had few, if any,inherent cracks and had a very consistent colour and texture.

13, Internal framework.

With the floor frame out of the way, The next step was to frame the internal walls within the completed rear section.For these I used 140mm x 45mm radiata pine which I sourced from local farm windbreaks. This timber, after I milled it, needed to be seasoned. For this purpose I constructed a solar kiln into which I placed the sticks after the initial air drying.The Kiln, ready to go with a load of wood, the side panels are removable to allow easy access.
The kiln again, with the panels in place. The small extension on the left was added to enable me to fit 6 meter lengths inside.
The kiln works by fans, mounted in a false ceiling, sucking internal air through holes in the bottom of the side panels, up through these panels and under the roofing to heat it. The air is then forced down behind a false wall in the back and out through a series of holes and through the wood stack. The small movable flap in the base of the centre panel allows me to exchange a small amount of air to prevent it from getting saturated. In cooler weather I simply place a small column heater inside to warm the air. The kiln works ok but it still takes many weeks in warm weather to dry the timber to below the 12% moisture content required for pine, but, who's in a hurry?

Monday, August 25, 2008

12, Floor framing.

Starting in 1998 I worked on the installation of the stumps and piers and the construction of the cellar, pouring a reinforced concrete floor and erecting reinforced double brick side walls. With these ready I then had to concentrate on the timberwork for the ground floor.
As I knew the floor frame would be exposed to the weather for some time, I had to source some durable hardwood. This I managed to locate about 150km to my north west. It comprised a mixture of Yellow and Grey Box. Initially I had the offer of some yellow box on a farm near Raglan, felled the previous year, I milled these logs on site with my portable sawmill. Being dry this was very hard to cut, but yielded some beautiful timber. Happy with that lot, I had a chap from Lamplough, near Avoca, deliver to my place some green Yellow box logs. I milled these with mixed success owing to the fact that when sawn while still wet they tend to split apart along the growth rings, a bit like an onion.
To make up the balance of what I required I hitched up my mill again and returned to this area and selected on site, suitable Grey box trees for felling and milling.
I used 125mm x 75mm Bearers, supporting 100mm x 50mm Floor joists over the entire house except over the cellar where 150mm x 50mm joists were used.

11, Lower back wall.

December 1997 rolls around and the rear ground floor wall nears completion. Up to this stage of construction I had been splitting and cutting other basalts, sourced close to home, intermixed with the Beeac stone with mixed success. The nearest, from the south west slopes of Mount Duneed 15 km away, proved to be too cranky and brittle with uneven texture, rather unfortunate considering its close proximity. The next closest source was from Gnarwarre, a lava flow to the east of Mount Pollock about 20km to my north west. I found its texture to be a bit fine, it was also very hard, with a large amount of quartz and seemed to have the effect of dulling or clogging the cutting edges on the diamond tipped cutting blades which I was using in a 9 inch angle grinder.
The arches over the French doors were laid using timber and chipboard formwork and are solid limestone, both inside and out. Unfortunately no photographs were taken of their construction.
Around the same time I had decided that the area below the floor toward the front of the house was wasted and I excavated the section below the central stairwell deeper to allow for the provision of a small cellar.
If you were eagle eyed enough you would also have noticed the fireplace base in the background had grown since the picture was taken in the previous post, this was to allow for the installation of a wood stove in the kitchen, an item I had overlooked in the original design.

10, The walls start rising.

By the middle of 1996 the walls had started to rise, the thickness of the beds on the stonework is 415mm. Temporary formwork is erected on the inside and rubble is used to make up the space behind the face stone. Bond stones, the full thickness of the walls are placed at regular intervals to tie the whole mass together. Common bricks were used to construct columns adjoining the existing cottage where the walls are completely hidden.
As mentioned earlier, due to planning rules, we were unable to erect a separate dwelling, we had to build on as an extension. When completed, it will appear to be the reverse, as if the weatherboard section was added later.
We are not making any plans until completion for the fate of the cottage, whether it too be clad in stone or not and what purpose it will serve, either a granny flat, garage or an extension of our living space.

9, Limestone.

The middle of 1995 saw the delivery of 18 pallets of Mount Gambier Limestone, about 21 cubic meters, enough to clad a complete house in veneer construction for a total price of about $1700.00 including freight, (it pays to shop around). The sizes were many and varied allowing for the various quoins, lintels, string courses and corbels, All heights were 290mm, widths 100, 140, 190, 240 and 290mm and lengths in 660mm increments to the 4 longest blocks being a whopping 2640mm, (8 feet, 8 inches). Only 1 of these longest blocks was required for a triple window but I was so worried about easy breakage at this length, I made sure I had spares.

I set about trying a few different bevel sizes on the quoins and arranged them in a mock up to see what I preferred, the different bevels being on the left; 56mm, centre; 45mm and right: 37mm. I opted for the more subtle 37mm giving the stones a 26mm (1 inch) horizontal protrusion. Now in hindsight with more wall areas to look at, I feel I should have had them even more subtle, probably about 26mm.
Further information on this stone can be found at the following web site;
http://www.pir.sa.gov.au/__data/assets/pdf_file/0015/10905/mj28_gambier_stone.pdf

8, Cills.


The window cills seen in the above picture were one of my most fortunate acquisitions, after reading in the local paper in early 1995, of the protests against the demolition of "The Priory", a federation style building associated with "Ariston", an historic house in Geelong West, I took a drive past on my way to work the next morning to see what all the fuss was about. What I saw had my got my heart racing, the timber window and door frames had all been removed and the complete set of bluestone cills were sitting loosely in their positions. Following a few frantic phone calls I was in contact with the demolition contractor, disappointment was my initial reaction, with me being told that the purchaser of the windows had first option on them. Persistent harassing on my part during the course of the day finally had him relent by mid afternoon, provided I would part with the sum of $500.00. Needless to say that within the hour I was back there with my father, his truck and a couple of extra hands. The total sum of my purchase being 26 window cills of varying sizes, 1 large front door cill, 2 smaller door cills, 4 large steps and a few roofing slates.


On tallying up the 7 different cill sizes and comparing them with my plans I was amazed to find that they matched almost perfectly with very minimal resizing of the windows being required, I couldn't believe my luck.

7, Base and Plinth course.

November 1995 and my learning curve for stone masonary was getting incredibly steep. When construction on my place was first beginning I had no intention of doing the stonework on my own, however, as things started to happen no stonemasons were knocking on my door and nobody in my acquaintance new of anyone capable of such work. Me, being the impatient, pig headed person I am, just started to lay the stone myself. I used the Beeac church stone as it came to build the base walls to a height of 900mm, onto this I needed a plinth course with a dressed bevel to bring it up to floor level. My original plan was to use Limestone for this as well as the window cills.
A close friend of mine had procured some bluestone plinth blocks from an earlier demolition near the barwon river in Geelong, he had them stored in his backyard for quite some time, waiting for his own special project. After much pestering he finally bowed to my pressure (and his wife's!) and allowed me to "borrow" them. The quantity looked quite impressive, however, when laid end to end there were only enough to do the west wall, this meant that I was going to have to make my own matching blocks for the rest of the house. This work occupied most of my spare time for the next few months, with each block taking more than a full day to complete.

I roughly cut the dressed edges using a diamond blade fitted in a nine inch power saw set to the right bevel, the hours were then spent using a hammer and chisel to dress the edges to the true angle and plane. The faces were then pitched using a pitching chisel.

The same plinth block shown above roughly wedged into position. The gaps left in the stonework are for the sub floor vents (cast iron).

Wednesday, August 20, 2008

6, Bluestone.

During 1994 we procured a large amount of bluestone (about 60 cubic metres), that had been salvaged from a church at Beeac, demolished some 10 to 15 years previously.The previous owner of this stone, who had dismantled the church, relocated it twice, it finished up at Anglesea where he had planned to use it to construct his own home. His dream, unfortunately, came to an untimely halt when he suffered from a fatal coronary.
This stone varied from the stockpile we had already accumulated in that it was vesicular basalt (honeycomb). This type of stone is formed in faster cooling lava flows when the bubbles of gasses are trapped in the solidifying mass.
The total volume procured included a large amount of dirt and rubble with a lot of the good blocks having been siphoned off somewhere between the demolition and our place.
We purchased this lot with the intention to use it for fill in the backs of the walls and anywhere else it would not be seen, however, the more I looked at it as it sat around our drive, the more I began to admire the natural looking texture on it's split faces. Ultimately I decided to reverse the roles of the 2 different types, with the only exposed plain stone being used in the plinth course and for window sills and door steps.
With a few rough calculations I guesstimated that this lot provided us with only about 20% of the total face stone required, resulting in a further supply of similar stone needing to be sourced.

5, Sub walls

By January 1995 I had Constructed the sub walls. The front yard will be terraced on completion of the house, bringing up the ground level to that in the foreground. With this part of the building being buried I could see no point in wasting good stone on it, hence the cheap bricks and concrete.

Tuesday, August 19, 2008

4, The real work starts.

October 1994 and work starts on the main house. The original proposal was for a separate dwelling to the original cottage with the latter being retained as a garage/granny flat. We decided to shelve these plans mainly due to the local councils planning rules which prohibited the issuing of a permit for a second residence on the same property.
We had the footings designed to be solid enough to allow us to not have to include expansion joints in the masonry (for obvious reasons when you look at the stone work).

3, Retaining walls.

By the summer of 1993/4, (this is the southern hemisphere), I was well underway with the retaining walls around the back of the site cut for the main house. The stone for these walls is Basalt paddock rock from Gnarwarre and Wingeel. My father had dug the cut 5 years previously and it took a fair bit of work digging away the silt that had accumulated.

2, Shed needed

By 1991 I had started constructing my shed/workshop, the most important thing to be found in a blokes backyard. The hardwood for the wall frames and roof purlins was accumulated over a prolonged period from leftover roofing materials. These surplus sticks were consigned to the tip when sites were cleaned by a large house building contractor with whom I was working for at the time.
The old rail vehicle is an ex Victorian railways refrigerated (by ice)"T" wagon number 161. This "shed" was purchased by my parents from the Ballarat workshops in about 1975/6, it resided at their property at Torquay until 1990 when we relocated it to "my place"

Monday, August 18, 2008

1 The beginning.


After purchasing the property in 1986, I immediately set about erecting an initial cottage.
This house was built around the 2 front windows. These windows I had procured as souvenirs from the demolition of one of the last remaining, original victorian cottages in Torquay, which stood on the Geelong road at the corner of Peubla St.

Thursday, August 14, 2008

Introduction


Back in 1994 I began a project to build my own dream home in Bellbrae, Victoria from scratch, at the time I had no idea what I was to be in for. Being a bit fussy I was loathe to farm out much work to others hands, as a result I have spent most of the last 13 years building with my own hands.
The house is constructed from Bluestone (Vesicular basalt) sourced from paddock rocks from various localities within 120km, most of the face stone being from near Warrion, north west of Colac. The quoins and string course are of Mount Gambier Limestone.
At this stage I have almost Completed the ground floor of this 2 storey construction.