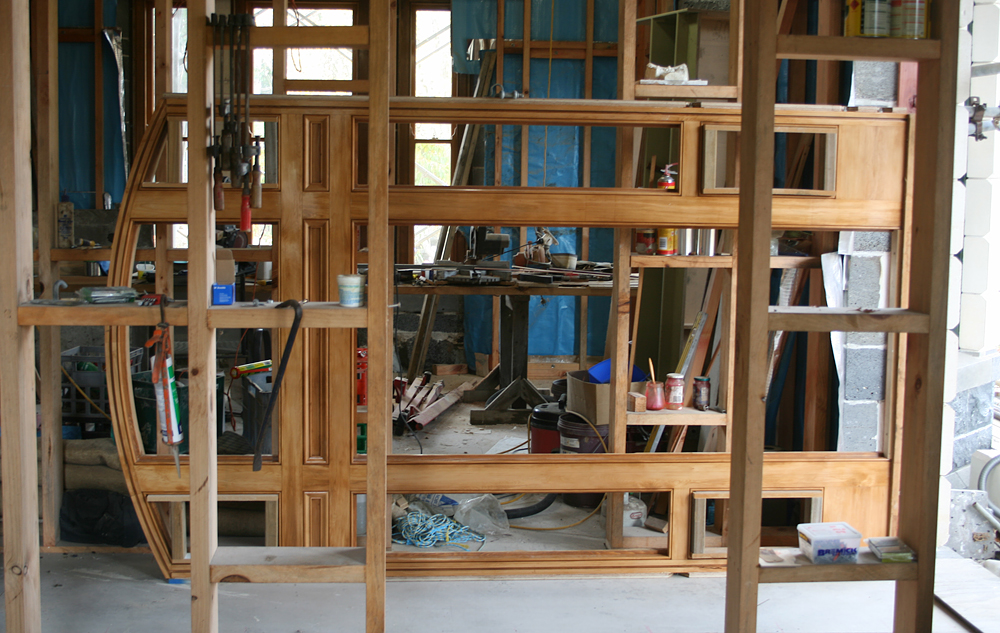
Monday, the 13th of May, was a bit of a highlight for me. The frame was finally ready to be installed. All the loose bits were taken off and put aside, then, with the aid of a number of ropes and shackles, I lifted it off the stools and dropped one side to the floor.
Resting on the reveal, I was then able to slide the unit through to the entry, where, using the ropes again, I lowered it flat to the floor. The temporary frames were left in the corner sash openings to help avoid any damage.
With the bottom positioned on the cill, I reattached ropes to the head and via shackles, fed it up to the rafters and back down to within easy reach. I was able to lift it up in stages by hand, holding it, after each grunt, by the rope. Owing to imperfections in the hand hewn bluestone cill, which I felt would be too hard to copy to the timberwork via measurements or templates, I opted to leave the frame slightly oversize and mark scribe lines on it, once in position. This, thankfully, worked satisfactorily the first time and I only needed to lower it back down once for trimming.
I was more than happy with the fit, just like the proverbial glove. The sides were screwed, through the reveals, into trimmers bolted to the stonework.
The stone cill already had holes sunk into it from it's previous life and I was careful to make sure that the mullions would cover them when designing the frame.
Grooves were chiseled in the base of the frame and the pedestal backing block to accommodate a stainless steel bolt. The bolt was then epoxied in place, sandwiched between the timbers with the head located into the rearmost hole.
With the frame all secured in place, the sashes were trimmed and fitted and a start was made on the attaching of the appendages.
First up, the pedestals were boxed out and capped. The Lebanese cedar that I used for these and the upper portions of the plinth, came from a tree removed From Kardinia park in Geelong. The poorer, slower growing conditions there, other than that at Daylesford, from where the rest of my supply originated, created a tighter more attractive figure in the timber. The difference is quite apparent in the above photo, where a comparison can be made with the infill panel. For the lower, larger portion of the plinth, I used Celery top pine, which, being much more dense, should cope better with any knocking or scuffing.
During assembly, I am placing the "grease proof" paper behind the timber, to avoid getting paint all over the stonework. Hopefully it can simply and cleanly be pulled out later.