Showing posts with label mortice and tenon. Show all posts

Sunday, August 4, 2013

76, Front Door, part 7, the Door.

To individualise the door I chose to embellish the lower panel in a similar fashion to the shamrocks on Foynes; http://www.winkieg.blogspot.com.au/2012/08/67-front-door-part-1.html.
Lots of ideas passed through my head, but my love of the Quercus genus and the slowly expanding plantation of these here for my Truffle venture, had me settle on the carving of an Oak leaf.
As we were now well into Autumn, there was plenty of leaves on the ground, from the myriad of variety's of Oak planted all around the property. I picked through the piles, collecting as diverse a range of leaf shapes as possible for a final selection.
For me, the best example that represented the Genus, that was also of pleasing proportions was the smallest one in the above photo. It belongs to Quercus Robur, the English Oak, probably the most widely planted variety in Australia, hence the familiarity. I photocopied the leaf and enlarged the image until a suitable size was attained for tracing on to the panels.
Some of the other leaves shown are a selection of American variety's, with the deeper lobes, Canary Oak, in the centre and some Mediterranean variety's, with the serrated edges.

The door was to be made entirely from Lebanese Cedar. I formed all the panels in the same way, laminating various pieces together to make up the widths and then applying bookmatched veneers to the inside faces. The bulk of the waste was then removed from the front. The edges of the raised section on the panels were routed to the finished profile with extra thickness allowed for the patterns.
Using various templates and jigs, a rough outline of the leaf shape was routed out. This ensured a flat and even background was attained. The leaf was then more finely carved to profile with chisels and the surface was veined and lightly contoured, to give it a bit more life.
The shield patterns on the upper and intermediate panels were routed using mdf templates and a bastardised rounding over bit. I couldn't locate a suitably profiled bit from the local suppliers, so the nearest alternative I could procure was carefully ground on the bench grinder, until it was close enough to the right size.

The door was assembled using the normal methods of wedged mortise and tenon joints. I ran a large quantity of bolection mouldings, more than sufficient for all of my external doors. This was owing to the amount of setup required, for the multiple passes over the router table, to achieve the desired finished profile. From memory these totalled about 7, not including the initial sizing and the final rebating. The rebates are matched to suit individual doors, dependant on the depth of the finished panel from the face.
Once completed, the hinges were sunk and the door was hung and lightly trimmed to suit the opening. The inside face was finish sanded, then, as per the frame, was also stained and lacquered before final installation.

A suitable mortice lock for the door proved rather difficult to source. Currently, the lock ranges available, incorporating a brass finish are very limited, the common response from suppliers was that it's now "out of fashion". The combination of a long case, to provide a greater visual separation of the handle from the key barrel, and the correct 'backset', left only one available option, which had to be ordered from the manufacturer in Tasmania. Unfortunately though, the supplied striker plate, the only that was available for this model, was a universal fit that looked rather flimsy and daggy with it's one long slot. Visits to a couple of restoration supplies found nothing else suitable, so I sourced some brass plate and made my own!.

The hole is finally plugged. Plywood was cut to temporarily fill the glazed openings until the leadlights are designed and made. 

The shameful self promotion couldn't be helped for this external shot, the ladder is lashed to the scaffold in that position, for access higher up!.
The only thing left to be done now, before painting, is the carved Brackets, (or Modillions), which sit above the capitals, the subject of the next post.


Friday, December 28, 2012

68, Front Door, part 2.


With the main components prepared, assembly of the frame could begin. The curved joints on the Head were first. I figured that these would be the hardest to form and get the shape right. Once I was happy with them, I was able to set out and mark the rest of the pieces.


The Transom was halved over the Mullions and rebated into the Stiles


After two and a half weeks and much routing, chiselling and trimming, all the major components are finally dry fitted together.

The sashes were next on the agenda, then, with these ready, I was able to move on to the machining of the external embellishments. That was when the trouble started, the thicknesser refused to power up, with the main motor only producing a loud humm.....I was about to head off sideways again.....

Saturday, April 28, 2012

62, Sash assembly.

One detail, previously not mentioned, is the beading I had run on inside faces of the sash pieces. When I built my initial cottage, seen here in the beginning, It was designed and built around the 2 front windows. These I had rescued from one of the last remaining, original cottages in Torquay. Sited on the main Geelong road, it was being demolished to make way for the exploding surf industry. You can't stop progress, but it was all I could do at the time to preserve the past. The wood stove from the kitchen was claimed as well, but unfortunately, the chimney came down, rather quicker than was expected, and reduced it to scrap.
The beading's on these windows are the standard Victorian profile with the size matching the glazing rebate of 1/2" x 1/4", (12.7mm x 6.4mm). The curve segment is less than 1/4, giving it a flattened appearance. The balance of the windows in my cottage were a combination of some crappy recycled hardwood frames and 3 other sets I made myself, my first foray into this area. For these I purchased "off the shelf" moulded cedar, (western red), stiles and rails, although the beading moulding was different. I was happy with the results and the kitchen window is still working beautifully, the other two were removed to make way for the "extension". The construction of these gave me the confidence to completely make, from scratch, a new Bay window, shortly before I commenced the extension. This was to replace the large, rotting hardwood frame that I had installed in the west wall. This time I made some effort to replicate the original beading's using a small, 1/4 segment, concave router bit. I tweaked the stepped shoulders to get the nearest visual likeness that I could. This worked reasonably well, but, when it came to the windows for the main house, my standards were improving and near enough wouldn't be good enough!. For these I bit the bullet and ordered a new router bit, custom profiled. During my travels I had managed to procure an old wooden hand moulding plane with the correct blade for doing these, however, my enthusiasm for the construction did not quite stretch far enough to go down that path!.

Having all the main pieces machined, things became more hands on and fiddlier. The faces of all the stiles, at the base of the horns, adjacent to where the meeting rails join, had to made flush with the rebate and sanded smooth. The beading on the lower stiles was shaved back and scribed, however, on the upper stiles it was cut flush as, on these, there is no bead on the meeting rail.

The opposite ends of the stiles required rebates to be formed to accommodate the haunched tenons, this prevents the top and bottom rails from twisting. Then the beading's were also cut back and scribed.

A test fit of a meeting rail and a stile for a bottom sash. On the lower sashes, the glass fits up into a groove in the meeting rail .

No shed is ever big enough!. I could only scrounge enough room to set up two gluing tables and with the exception of the narrow sidelights, shown in the upper photo, I was only able to set up enough clamping for four sashes at a time. This worked out to be sufficient anyhow, as it was taking anything up to an hour to prepare each sash, this included the previously mentioned trimming and the fine tuning of the shoulders and scribes to true up the joints. I struggled to keep up, having enough sashes prepared for when the glue on the previous lot had set.
For 6 days straight, I had 2 clamping sessions per day, one about midday and the other about midnight. These sessions took about 2 hours each, by the time I coated the glued surfaces, assembled the sashes, lightly clamped and squared them, tapped the wedges firm, hammered in the joint wedges and then wiped all the excess glue from the faces.
I do possess an odd collection of sash clamps, but, when set up for this sort of work they tend to be unwieldy and hard to control. With their average lengths being about 1800mm, (6 ft), they would also require a lot more space. For this project I opted to assemble simple clamping jigs using wedges. The back blocks, being screwed down, could be easily relocated to suit the differing widths. I hadn't tried clamping this way before but was very happy with the method, it was very simple and effective.
By the last night, I was buggered, but was certainly glad to have had this bit over with.

At last, the sashes are together, all ready for trimming and sanding. They all look good, bar one. In my haste, (or stupor), to clamp up the final batch, I was careless with one joint, then over clamped it to close the gap, which led to it twisting. Fortunately though, it was for one of 2 sidelight windows which are fixed in place.

This simple jig, set up on my bandsaw, allowed me to quickly and neatly trim the waste from the wedges and tenons.

The joints are trimmed and the sashes are ready for sanding, before the trimming of the stiles, bevelling of the bottom of the lower sash's, grooving the sides for the ropes and fitting into the frames. There's still a long way to go....

Thursday, April 19, 2012

61, Joinery, part four, Window sash preparation.

The tedium of assembly line work has reached new levels with the commencement of the sash construction. 23 window frames equals 46 sashes equals 92 stiles and 92 rails equals 184 wedged, mortise and tenon joints!


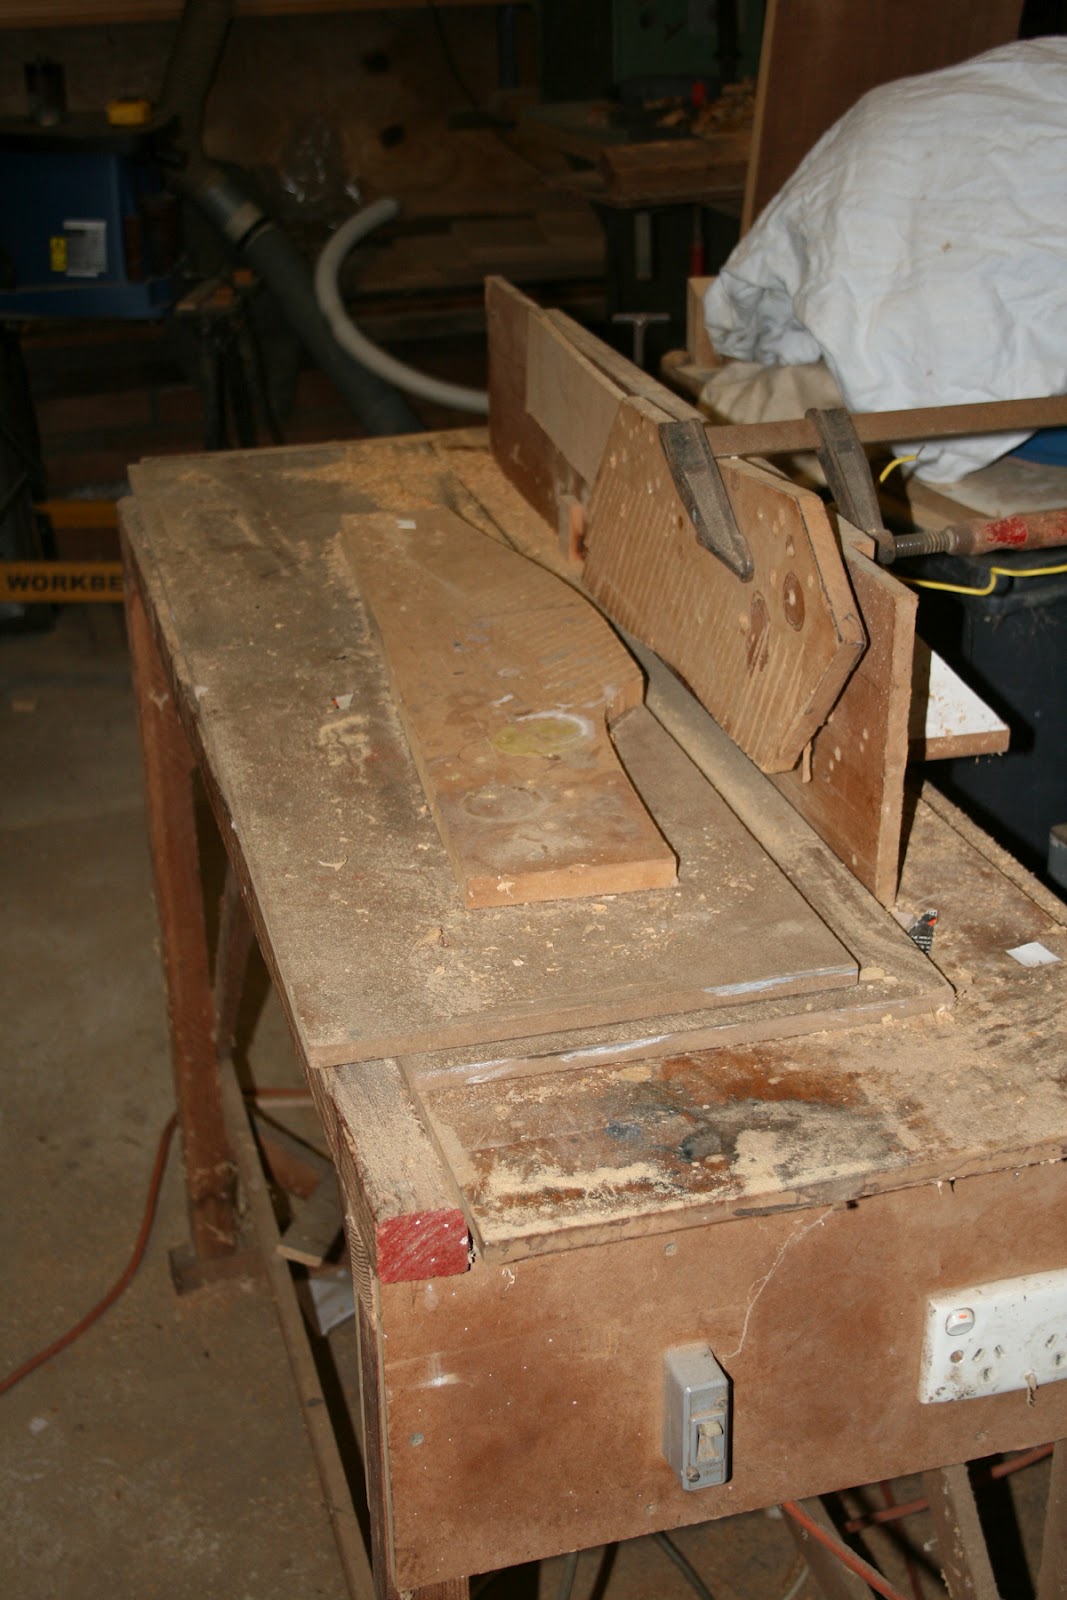
The mouldings and rebates I machined on my old home made router table. It has performed a massive amount of work over the years and the table top is almost past it's "use by" date, hence the extra sheets of Masonite to stiffen up and true the surface!
I had originally formed a 12mm deep, glazing rebate in the sticks before I stacked them away, this being more than sufficient for single glazing with plenty of room for beading's. The finished thickness of the sashes was 42mm and with a 12mm moulding on the inside, 16mm was left in the centre for the joints. In more recent times, however, I have been considering the inclusion of double glazing. Despite being over regulated in most aspects of building in this part of the world, we still have no requirements for this "luxury", it's just a "nice to have" item. Unfortunately, standard double hung windows don't readily lend themselves to being double glazed. Their future conversion, once assembled and balanced is also a job that I would not wish to tackle.
I carried out some homework and researched a variety of insulated glazing systems. One method I came across, that can be found here; superspacer, seems feasible. The product is distributed locally, (well, within 200km!) and is available down to 4mm in thickness. It doesn't require any special machinery or tooling to assemble the units and seems reasonably priced.
Some years back, shortly before my Father-in-law retired from his position at Pilkington glass in North Geelong, he was able to procure for us a large supply of 4mm thick glass for a fantastic price. I took delivery of  of more than enough pieces for my needs and stored it all away in a sealed case, ready for this stage of the build. Using this glass and the 4mm superspacer, I could theoretically make 12mm thick, sealed units. This is not an ideal insulation solution, but it would certainly outperform any single glazing.
I toyed with the idea of increasing the rebate depth in the sashes to 16mm, they would then have enough room to fit these units. Very little space is left, however, for beading and I will need to rely on a bead of sealant to keep everything in place. I may need to do some more investigating on that.
I have opted to start heading down this path and ran all the pieces back over the router table to deepen the rebate. This then had the effect of reducing the joints to 12mm in thickness which, I figure, is still quite acceptable. The drawback of this action, however, meant that the joints would need be formed "off centre", creating more headaches with their construction.


My 'cheapie' chisel morticer, an invaluable tool for this sort of work. I have improved it considerably with the provision of a new base incorporating a two way, cross slide vice. To minimise "breakout" I cut the mortice's from both sides. The stiles did however, suffer a certain amount as, when drilling the first holes from the face, I set the depth stop a bit too deep, resulting in some splitting occurring on the outside. The mortice's were cut at 90deg. from the face, with the angled block being used when doing the back cuts to enable me to form the wedge shaped holes.

Stage 1 taken care of... 92 stiles with their mortice's complete.

Next on the agenda was the rails. I am currently the proud owner of three spindle moulders, the second two bought because each was better than what I already had and was offered for a "good price". At this stage, neither of the better two have been converted to single phase operation. The last bought machine, seen in the above photo, incorporated a slide groove in the table top and I opted to use this for the machining of the tenons.
The first thing to be done was the fitting of a router. The original spindle, which I had removed to lighten the load when bringing the machine home, was still separate. I turned up a new table insert to suit the router cutter, drilled and countersunk holes in it to align with tapped holes in the router base and then used this to clamp the router below the table.
That sorted, I knocked up a sliding table. This incorporated two separate right angle guides, each providing a different depth of cut, the price to pay for having offset joints. A fair bit of fiddling was required here, with various shimming sizes trialled until a balance was achieved for the two different shoulder depths.
To add to the headaches, a combination of 3 different window heights and 7 different cill lengths led to a total of 11 different window sizes.

Stage 2 over, the tenons complete. The meeting rails, in the foreground, were particularly fiddly to machine. The joints being partly cut on the bandsaw to allow the splayed edges to continue over the faces of the stiles.

Back to the stiles. The final thing to be completed, before assembly could be commenced, was to cut and sand the horns. There is a myriad of shapes and designs for these and indecision on my own choice was the reason for this being left until last.
I had scoured through all of my photo's and took a number of detours during my travels to identify as many different patterns as possible. I shortlisted my favourites and cut samples on some scraps. On presenting these to my wife, her choice actually matched mine when she selected the simple ogee, the same as on my original windows!. A couple of days of bandsawing and smoothing on my bobbin sander and the stiles were ready to go.