Showing posts with label bluestone victorian basalt saw. Show all posts

Saturday, January 12, 2013

70, Some flooring and Trimming.

During the past months, not all my time was wasted, tinkering with the Rotary convertor.
Two separate lots of decent secondhand chipboard flooring came up on eBay at reasonable "Buy it now" prices. It was just nicely enough to sheet the floor in the remaining ground floor rooms. It is only intended to be temporary and was lightly screwed to alternate joists. The permanent timber strip flooring, to avoid any possible damage, will not be fitted until all the major structural work is complete. There are thoughts, at the moment, going through my head of possibly laying some parquetry to the main areas, if this comes to fruition, the sheets will remain in those areas but will need to be further secured.

A couple of days was spent straightening the, now well seasoned, floor joists. The electric  planer found it pretty tough going and blades were replaced a few times owing to the hardness of the "Box" timber and the amount of ingrained dirt it contained. This was despite using brushes and compressed air to clean them as much as possible.


The Lounge room,on the East side was the first to be done and, with a good platform to work on, I was able to "Stud" the external walls. This framing is non load bearing and creates a cavity for power and communication cables as well as the plumbing. It also provides some space for insulation to be inserted, to prevent the stone sucking out the heat during winter. The extra wall thickness created, also improves the aesthetics of the window recesses.

The west wall, laid before the "saw" days, was constructed using formwork on the inside. Laying the stone against it caused the excess mortar to squeeze out and spread across the face. At the time, I couldn't see an issue with this "unseen" side. Subsequently, however, I found that much of it can break loose fairly easily and can cause problems when trimming the wall. Pieces would drop down behind the insulating paper, jamming behind the framing making it difficult to straighten.
The first hot day of the Summer, the Sunday 2 days before Christmas, was spent chipping off  the excess, in the relative coolness inside.


The wall, once cleaned, was much more pleasing to look at. In a way, it's a bit of a pity it will all be covered. The rows of bricks were placed to ensure a flat anchoring point for timber blocks, attached to the noggins for securing the framing. I wanted to get this done before the flooring was in place, cleaning up was easier, particularly along the edges around the bearers and the dust cleared better, falling to the ground.


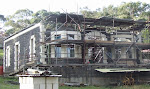
Where it's at now. My current stocks of seasoned and dressed 70 x 45pine have been depleted, so the trimming of the Dining room, on the West side will have to wait for the time being.

With the fire season upon us, my attention has been diverted to the temporary roofing. I'm currently unable to fill the big hole in the front wall with the entrance door, but due to it facing south, it's not as concerning to me as all the gaps around the perimeter of the roof line. This may be the subject of my next post.

Tuesday, October 13, 2009

50, Ground floor stonework completed. (for now!)

Back to the bluestone, it was time to cap off the ground floor stonework. After much thought on how to construct and secure the first floor balcony I finally reached a decision and was able to cut the blocks to suit. The blocks were to be a depth of 165mm and, to help to tie the wall together I cut them 440mm in width, the full wall thickness (excluding timberwork). Where the windows are situated this thickness narrows to 265mm to allow the flooring to extend into the opening.


For these blocks I used some large stones, ex railway platform coping's, as well as one squared stone weighing in excess of 450kg, (which yielded 2 blocks), from my stockpile of "scavenged and hoarded" bits and pieces. As the maximum cut of the saw is 440mm and I wanted the blocks slightly wider for later trimming the last bit of stone was broken apart and cleaned up later.


Once roughly cut I needed to saw a 45deg bevel to one top edge to match that of the limestone in the string course. Rather that adjust the saw for the angle, I found it easier to set up a simple cradle in which to mount the stone.


With the bevel cut accurately it was a simple matter, albeit time consuming, to hand chisel the exposed surfaces. This completed the next step was to cut a rebate in the lower face to allow the flooring to slip slightly under the nosing, this is to enable it to be better sealed to help prevent water egress. Following this, a drip groove was sawn on the bottom to ensure any moisture which does penetrate can be sheeted to the outside, this is of particular concern over the bay windows.


The weight of these completed blocks averaged about 180kgs which raised the problem of being able to gently place them in their final positions. To overcome this I made a lifting clamp specifically for this purpose, with a bracket hooking into the rebate and a pin which locates in a shallow dimple drilled in the back, it worked like a dream. This clamp can be modified down the track to handle any other shaped stones of similar thickness.


A four foot doorstep was also needed, but my stockpile did not include any blocks clean enough to be used "as is" for this purpose, so one needed to be trimmed down. Rather than spend the time hand chiselling, I opted to try a different method, this entailed making successive light saw cuts across the top and front face of the step, simulating a tooled finish. The process took a little longer than I had envisaged. The top, needing a saw spacing of about 1.5mm for a nice finish, took 4 continuous hours to complete, while the face, at 2mm spacing, took 3 hours. The saw blade, by now has had considerable use and the cutting tips have become very rounded. This necessitated the close spacing required to avoid having the corrugations too deep. The lighter blotches visible on the finished step are areas of quartz which naturally occurs in basalt, this tends to fade and discolour over time, becoming much less obvious. I am very happy with the end result and feel it was well worth the effort.


Lifting the blocks to their rough positions.


The lower front wall finally complete, showing the recesses for the upstairs windows.


The almost complete east wall. The top bevel on the limestone in the string course will be trimmed true once the blocks have dried out.